Whilst I am still awaiting my 'full fat' copy of Victory at Sea, I play occasional solo games to get used to the core mechanisms in the Pacific 'lite' version. Whilst I love the rules, I'm not thrilled about Warlord's chosen scale of 1:1800. Its too big for full spectrum fleet actions, and too small to really show off smaller Destroyer and Cruiser actions. I'm not that impressed with the soft resin models either...
 |
| Fletcher Class DD in DLP plastic from The War Times Journal shop. |
So I've gone for 2 scales of models from various interweb 3d printed sources. ( I have everything else in at least 2 scales, why should this be the exception!) But this time there's some logic to it - 1:1200 for smaller ships, 1:2400 for when the battlewagons and flattops get involved....
 |
| HMS Exeter - a labour of love, the Type 42 Exeter was my first ship as a Senior Rate! This model from Shapeway's Tinythingamajigs. |
So as well as mastering the rules, the purpose of this game was to continue tinkering with scale issues. In my last game with 1:1200 models, I doubled all distances. In this game, I will keep the original 1:1800 distances for movement, and just double the ranges.
 |
| USS Astoria, from XP Forge. Nice models, amazing customer service. |
I didn't spend much time on the scenario itself - think 1942, South Pacific, top end of The Slot, around dusk, Air Threat White.
 |
| HMAS Australia - Tinythingamajigs again |
A mixed force of US, RN and RAN Cruisers with accompanying DDs are steaming north, pushing into enemy waters...
 |
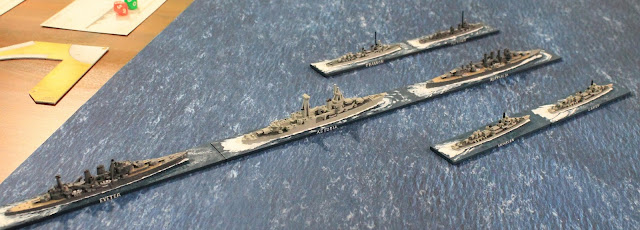
| The Allied cruisers with DD escort: Australia (Flag), Astoria, Exeter, with Fletcher, O'Bannon, Monssen and Laffey on the flanks... |
and encounter Sentai 6 and friends on a reciprocal course...
The IJN cruisers are led by 2 Mogami class monster cruisers, Mogami and Mikuma...
 |
| XP Forge Mogami class |
With the rather cute Kako bringing up the rear - the 'little' heavy cruiser that could...
 |
| XP Forge Furataka class |
Escorted by three Fubuki class destroyers...
 |
| XP Forge Fubukis |
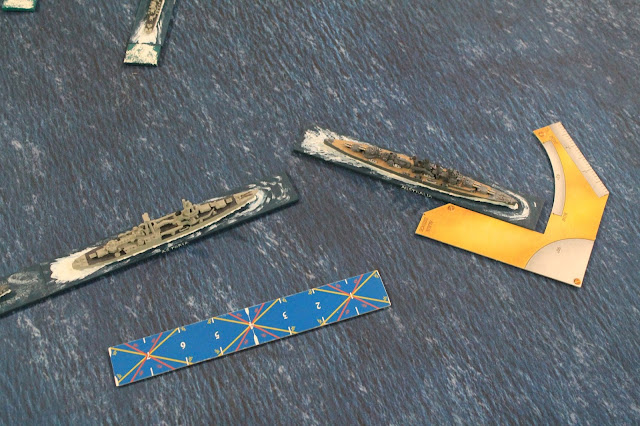
The IJN gets the initiative for the first move. The plan is to get the Allies in an anvil, between the DDs and CAs. Accordingly the Fubukis veer off to port and the Mogami leads a 'corpen' stbd (managed turn at best speed within manoeuvring internals to maintain relative position on the Guide) to attempt to cross the Allies' 'T'...
Being a solo game, the Allies are pretty quick to divine the enemy likely course of action, and the Fletchers are despatched post haste to deal with the Fubukis...Quite how you deal with 3 x Fubuki class super destroyers when your torpedoes are, ahem, not as reliable as they could be, wasn't spelt out...Still, in the finest traditions of the Tin Can Sailors, press on regardless and sort it out when you get there!
With all this manoeuvring and range finding, a major scale issue crystallized for me. Both the ability to station keep and get in range are adversely affected by the size of the model, which at almost any scale are way over proportioned to ground scale. In 1:1200 scale, the second model is 8 inches or so behind the Guide, and the third in line over a foot away - significant in game terms, even with double ranges! In reality if the Guide is in range, its consorts will likely be too:
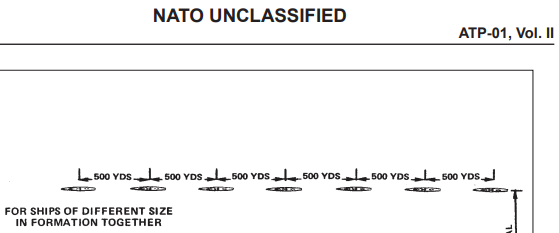
At standard manoeuvring intervals of 500 yards, even a fourth ship in column of mixed classes would only be 2,000 yards behind the Guide:
I experimented with various solutions, but the simplest and easiest is that second and successive units when in Formation 1 (Column astern of the Guide) simply take their range, but not bearing, from the stern of the Guide.
Bearing requires less 'house ruling' - since all measurements are taken from the bridge, so when in Formation 1 it can be assumed that successive vessels are able to maintain station on the guide, slowing down or sprinting as required. I only require that the model bases remain in contact to denote formation, to speed movement - I move a formation as one model to save time.
But back to the Surface plot: the IJN force is splitting to form an anvil around the Allies, the Allies have despatched the DDs as a Surface Action Group to 'deal' with the Fubukis. Australia is straddled almost immediately, and wanting to respond with more than just A and B turrets, opens the formation out to stbd. This will hopefully minimise the time spent in Mogami's Long Lance torpedo launching arcs...
And indeed we discover that whilst torpedoes can have considerable range, when you add the -2 modifier for extreme range to the -2 mod for firing torpedoes, the only way a torpedo will hit at extreme range is against a broadside on anchored vessel...
So both sets of cruisers settled down for a gunnery duel, with all concentrating their fire on the head of each opposing column, both Australia and Mogami receiving significant damage pretty quickly...
Out on the flank, in destroyer country, another observation was that rival DD's, keeping out of the way of each other's torpedoe arcs, find it very hard to hit each other with their guns, quick firing or not...
Shockingly soon, given the weight of fire on Australia, several critical hits, and then finally a particularly unlucky hit to her vitals, sent her to the bottom...
Deprived of the Flag, the Allies, penetrating ever further northward into hostile air and waterspace, turned back. An enjoyable and productive game which has confirmed that, with a minimum of modification, I can enjoy Victory at Sea in this large scale.


Excellent report and those models are lovely!
ReplyDeleteThanks Jim, glad you enjoyed it!
DeleteGreat report, and your thoughts about scales and ranging are much appreciated.
ReplyDeleteThanks mate, great to hear my musings are of some value...
Delete