'This is just suicide!' Lt. Col Sir Peter Farquhar, CO 3rd King's Own Hussars.
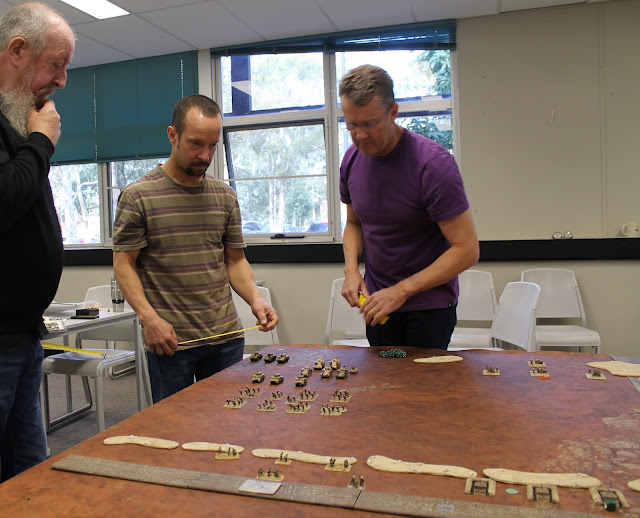
On Sunday, the Wollongong Wargamers used Flames of War rules to recreate the action of the 9th Armoured Brigade at El Alamein during Operation Supercharge.
During the North Africa campaign, the Brigade was commanded by
Brigadier J.C. Currie and fought at the Second Battle of El Alamein as part of
the 2nd NZ DIV. Its regiments and support were:
Historical Order
of Battle, 9th Armoured Brigade, 2 November 1942
3rd King’s Own Hussars (3KOH)
|
Royal Wiltshire Yeomanry (RWY)
|
Warwickshire Yeomanry (Warwicks)
|
9 Grant tanks
|
14 Grant tanks
|
14 Grant tanks
|
12 Shermans
|
10 Shermans
|
10 Shermans
|
16 Crusaders
|
13 Crusaders
|
17 Crusaders
|
26th New Zealand Infantry Battalion
4th New Zealand Field Regiment (24 x 25pdrs)
5th New Zealand Field Regiment (24 x 25pdrs)
Historical Summary, 9th Armoured Brigade, 2 November 1942
At 0615
Hrs, behind a rolling barrage, 9th Armoured split into 3 groups and
took over the advance towards the Rahman track, aiming to prise open the final
German defences. Monty had told Brig. Currie he was prepared to take 100%
casualties, but the Brigade had to get onto the Rahman Track, basis of a strong
German AT screen. The CO of the KOH protested that on the featureless terrain ‘this was just suicide’, but Monty
insisted.
The advance by the KOH is recognized as one of the greatest armoured
regimental actions of the war.
 9th Armoured Brigade was forced to
make its attack silhouetted by the early daylight. As dawn came on 2 November,
tank after tank was hit by the German 88 mm guns that kept firing through seven
air attacks. The 9th never reached their objective. In fact, they took 75
percent casualties and lost 102 of their 128 tanks. Nevertheless, they breached
the gun line and the 1st Armoured Division was now able to engage.
After the Brigade's action, Brigadier
Gentry of the 6th New Zealand Brigade went ahead to survey the scene. On seeing
Brigadier Currie asleep on a stretcher, he approached him saying, 'Sorry to wake you John, but I'd like to
know where your tanks are?' Currie waved his hand at a group of tanks
around him, replying 'There they are.'
Gentry was puzzled. 'I don't mean your
headquarters tanks, I mean your armoured regiments. Where are they?' Currie
waved his arm and again replied, 'There
are my armoured regiments, Bill.’ Just 24 tanks out of 94 survived.
Nevertheless, the assault had drawn in
both Littorio, 15th, and 21st Panzer Divisions, with the result that there was a wide gap in
the Axis lines to the south west. Through this gap, Lieutenant General Bernard
Montgomery, commander of 8th Army, pushed the remainder of his armour, breaking
the Afrika Korps line and pushing westwards into its rear areas and supply
lines.
In an account of the battle published to mark its 25th anniversary,
Montgomery wrote:
I must mention the magnificent fight put up by
9th Armoured Brigade - 3rd Hussars, Wiltshire Yeomanry, Warwickshire
Yeomanry.... If the British armour owed any debt to the infantry of 8th army,
the debt was paid on 2 November by 9th Armoured Brigade in heroism and blood....

· No Ambush
· Dawn rules in force.
· Attacker lays 3 objective and removes one.
· Deployment zones and objective zones size increased by 1/3rd.
· Limited Supply. Each Axis vehicle unit secretly rolls and sums 2xd6 at the start of the
Game: This is the amount of moves that unit can make in the game. This includes guns moved by prime movers.
Forces.
 Defending:
Germans: Additional player and Daniel. 2 x 80 Point Formations, one of
which is to include 32 points of Italian Armour, as follows: M14/41 tank platoon
of 5 @ 12 points, Semovente platoon of 5 @20 points. Total 160 points
Attacking:
British/NZ: The idea is to allow players to build their formations to reflect
the balance of armour in each regimental battle group above: ideally 3KOH
emphasising Shermans; RWY -Grants; and Warwicks - Crusaders. 80 points per formation.
Total 240 points
Table.
12 x 6 Table – Key
terrain feature is the Rahman track with low berm running the length of it out
to 6 inches to the East, providing short terrain cover and concealment.
Now I confess that when it comes to organising wargames, I am a meglomaniac - the bigger the table the better, crammed with as many toys as possible. The downside to this can often be unsightly tank scrums - the 'tank carpark' syndrome that those who have only a fleeting understanding of relative ground scale are critical of, or, worse, frustrating and stalemated games with no result. However, for a number of reasons, few of which I can take credit for, these negatives did not occur in this game and I'd like to share what I think are the reasons with you. Perhaps the most obvious is the terrain - open and uniform throughout, the only two features being the Rahman track and the ditch to its flank, so no obvious lines of approach and no chokepoints. I also limited each formation to 80 points rather than 100.
Simply because we don't happen to have a lot of desert toys - Yet!
Thirdly, not only did I add an additional objective marker to account for the larger table, but it so happened that the British team, in choosing which objective to remove prior to deployment left an objective at each end of the table which, along with the German one in the centre, left the possibilities wide open. That said, their initial deployment suggested they were firmly going left flanking - against my (largely Italian) northern sector.
Now the way Daniel and I as the Axis players decided to interpret the 'Limited Supply' aspect was entirely historical - the Germans simply commandeered the entire Italian fuel supply and left both the Semovente and M13/40 platoons completely immobile:
This made my deployment on the left (Northern) half of the table problematic - whilst he who defends everything defends nothing, both my armoured platoons had to be deployed as they had no fuel, which meant leaving my 88s and PAK38s off table, and the northern most objectives in my sector defended entirely by an Afrika Rifle Platoon - and a smallish one at that:
With Dawn rules in force, the first few moves were in full darkness, which allowed the Brits to close confidently with the Kiwi infantry to the fore, closely supported by the fearsome Shermans:

In the central sector to the south Daniel, with no fuel worries, was much more proactive and aggressive with his tiny force of Panzer IIIs, using the cover of night to threaten the British objective:
As dawn rose over this steadily escalating tank duel, Daniel's Marders were able to chip in with long range fire to even the odds somewhat:

Such was the depth of his strike that the British were forced to emply their artillery in the direct AT role:
But some accurate shooting by the Grants of the Royal Wiltshire Yeomanry steadily whittled down the Panzer IIIs until there was just one stoic survivor:
However he kept holding out, surrounded by a circle of burning tanks:

Until the bitter end - a posthumous candidate for the Knight's Cross I would think:

At this stage of the battle the action was centered around the northern and central sectors, with my desperate attempts to recapture my lost objective with my remaining infantry platoon, and Daniel forced to accept his bid to derail the British objective had failed and it was time to consolidate on our remaining objectives:
It didn't help that the tremendous weight of British artillery (3 x 25Pdr batteries) had finally redeployed and ranged in on my dug-in Semoventes and were systematically KO'ing them from left to right:
Just as I took consolation from the eventual arrival of my 88s from reserve, the Desert Air Force made an appearance:
However they were able to shoot down one of the Kittyhawks!
Daniel came to my aid with his reinforcements - a troop of Pz IIIs and one of Pz IIs.
The Panzer IIIs drew immeadiate Allied attention and were quickly despatched by a mix of Grants from one flank and Shermans from the other:

But the Panzer IIs proved surprisingly effective against the NZ infantry:
By which time my second Afrika Rifle Platoon was approaching from the centre of the table, to put in an assault:
Yet, despite the ravages of the Panzer IIs to their front and the DAK infantry on their flank, the tough Kiwi infantry fought off the assult and dug in around the objective. Technically the Allies had won, but for the sake of the game we agreed they needed to win another of the three to make it a convincing victory - the game was getting serious:
Unnoticed by me with my troubles on the northern sector, the sneaky Brits had sent the Warwickshire Yeomanry round the southern flank to threaten that objective. Fortunately Daniel's DAK infantry had a light AT gun and knew how to use it:
A couple of nailbiting assaults later, Daniel had beaten off a determined armoured attack to hold that objective:
The British focus now shifted to the remaining objective in the centre, held by my 5 M13/40s and a lone Pz III...
Oh, and some heavy duty long range sniper fire from the odd 88 able to snatch the occasional long range shot from the northern edge of the table:
The cunning Brits took their time and marshalled their forces, all the while whittling down my immobile M13s with their paper armour:
Until they gained an irresistible momentum and weight of armour to claim their second objective by move 9:
And so ended a terrific game that was a cliff hanger throughout, made good use of the large table, and was surprisingly historical in most aspects. I suppose the 2nd NZ Infantry Div played a larger part in this particular game than they did historically, but reflective of their gallant contribution across the Second Battle of Alamein as a whole!
 |
| Kiwi Infantry: Well Led - Well 'Ard! |


You might like this then ;)
ReplyDeletehttps://www.facebook.com/notes/ey%C3%B0imerkurstr%C3%AD%C3%B0i%C3%B0/charge-of-the-9th-brigade-heavy-armoured-squadron-vs-sch%C3%BCtzenkompanie/174167292782820/
Thanks mate - what amazing terrain - well done!
DeleteWe need to be playing What A Tanker with some of that collection!
ReplyDeleteIndeed!
ReplyDeleteLove those Grants and trying to take out Daniel's wretched lone Panzer III across the open sights of a 25 pounder was the highlight for me. Great game!
ReplyDeleteCheers, Caesar
Thanks Caesar - it was!
DeleteThis comment has been removed by a blog administrator.
ReplyDelete