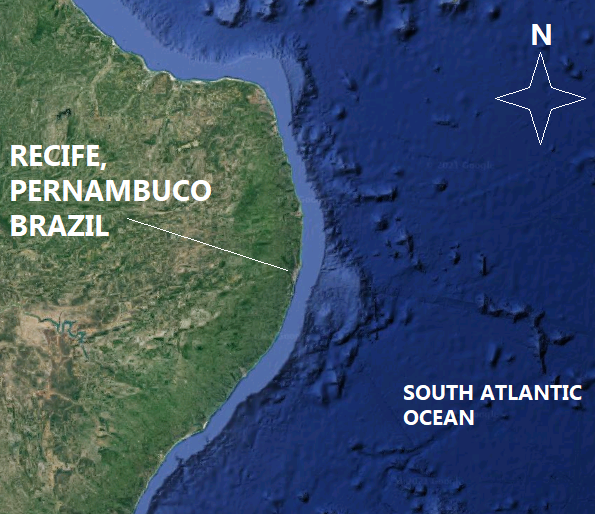
Since the start of August, entering a protracted lockdown, I have run a naval campaign game, #1939commerceraidingcampaign focussed on surface raiders, with the Wollongong Wargamers on our fB page. The campaign is set in the South Atlantic from the outbreak of war, with strategic day by day moves.
The campaign has been paused since one of the Allied Hunting groups has now located one of the German raiders, and the I fought the ensuing tactical engagement out on the table top, using Victory at Sea rules, following the advice of the players on how they wanted the action to go. I was also able to get a mid-game update from the Allied players half way through the game, via messenger.
Ian has been the German player, and whilst I can't give away his complete orbat, his units have so far done well, sinking 31,000 tons of allied merchant shipping right across the South Atlantic, a matter of some concern at the British Admiralty...
Through astute use of the ship's flight and DF intercepts from his onboard B-Dienst team, Ian, though by no means fully in the strategic picture, was able to gain the tactical initiative for this encounter. He knew that at 1500z (3.00pm) when he met the enemy they were on a reciprocal course and that last light was around 1700z in these latitudes in September. So he had to survive without significant damage for 2 hours and escape back into the Atlantic wastes to continue his mission of sinking merchant shipping...
 |
| Admiral Graf Spee's 'Anton' (Fwd) turret of 3 x 11 inch rifles. |
He also knew his 11 inch guns, compared to Exeter's 8 inch and Belfast's 6 inch guns, was his ace in the hole...For the record, Spee is classed as 280 points, Exeter at 115, and Belfast as 130.
His tactical instructions (CA= Cruiser Armoured, CL=Cruiser Light) :
The
Spee will keep sailing away and use range to punish
CL.
Then zig zagging and broadsides. Idea is to cripple the CL before it
comes within torpedo range then punish the CA. I anticipate heavy
damage if they press attack. If the CA keeps up engagement I will
sink it then turn around come back and sink CL by standing off and
punishing it.
For strategic reasons which I am not yet at liberty to divulge, the Allied team, John and Chris, were not desperate to sink the Graf Spee at all costs, they simply had to keep track of it and damage it if necessary:
TF M when engaging are to close as fast as possible to 8 and 6 inch range. All aircraft to be launched to provide target indication, and to prevent damage. EN ship is to suffer observed loss of speed or damage to main armament. Once this is observed, TF M launch torpedoes then withdraw beyond effective EN fire using smoke. If (damage experienced ) TF M is to withdraw and shadow .
Split allied attack:
Exeter steams north and closes distance to improve broadside and bring all turrets to bear
Belfast turns E/NE and attempts to get around opposite side and bring guns to bear.
In the first move with the Germans holding the initiative, the RN cruisers had to move first. Following orders, the Belfast headed off E/NE to open up a crossfire...
Spee opened the engagement according to the best German naval traditions with two extreme range hits from its rear Dora turret on the Belfast, which was unable to land any hits herself.
The Exeter got two in though!
The second round went much the same way, with both Belfast and Spee taking damage...
I resigned myself to a game involving lots of table scrolling as the RN cruisers, with the same speed as the Spee, simply gave chase. As they say in the RN, 'a stern chase is a long chase!'
But then in the third turn, the Exeter scored a critical hit on the Spee's machinery spaces - her flank speed was now cut from 6 to 5 inches.
Realising that escape was now less likely, in turn 4 the Spee turned broadside on to fight it out!
Similarly, the Belfast deliberately brought her ship's head around to clear arcs for all 12 of her quick firing 6 inchers...

Inevitably however, in trading 6 inch 'freedom bringers', no matter how quickly, with 11 inch rounds was not going to be healthy for the Belfast, which remained the focus of the Graf Spee's wrath...
Whilst not having experienced any critical damage, her hull integrity was down from 26 to 13. At 8 she would be classified as 'Crippled'...
Explaining in campaign terms that the Spee would have a 50% chance for her Marine Engineers to make good the propulsion damage whilst underway, and reminding them of the overall strategic situation, I sought advice from the Allied players via messenger:
Belfast to make smoke and disengage. Exeter to shadow at long range and try for lucky hits.
Belfast thus turned away to the South, no doubt heading for the nearest Allied dockyard, making smoke for all it was worth...
The Exeter opened to the WSW, keeping Spee under long range fire...
landing a few more hits...
and taking a few herself in return...So as dusk turned to night, Spee disappeared once again back into the lonely wastes of the South Atlantic, with her crew working feverishly on her propulsion systems.
So as well as inflicting the prop. damage, the two RN Cruisers reduced the Spee's integrity from 32 down to 18 - she becomes crippled at 10. Not bad! However, the poor Belfast went from 26 to 12, and would have been crippled at 8. Exeter got off fairly lightly, dropping from 21 to 17.
It remains to be seen what impact this will have on the campaign...